QEMU-KVM中的PIO处理
我们都知道在kvm/qemu的虚拟机中向端口读写输入会陷入kvm中(绝大部分端口)。但是其具体过程 是怎么样的,虚拟机, kvm, qemu这三者的关系在这个过程中又是如何相互联系来完成这一模拟 过程的。本文就是即是对这一问题的探索,通过对kvm进行调试来了解其中的奥秘。
零. 准备工作
工欲善其事,必先利其器。为了了解kvm如何对PIO进行截获处理,首先需要调试kvm,这需要 配置双机调试环境,网上很多例子,需要注意的是,4.x内核清除kernel text的可写保护有点问题。所以本文还是用的3.x内核,具体为3.10.105。所以我们的环境是target为3.10.105的内核,debugger随意。
如果我们直接用kvm/qemu调试,由于一个完整的环境会有非常多的vm exit,会干扰我们的分析。 这里我们只需要建立一个使用kvm api建立起一个最简易虚拟机的例子,在虚拟机中执行in/out 指令即可。网上也有很多这种例子。比如使用KVM API实现Emulator Demo, Linux KVM as a Learning Tool.
这里我们使用第一个例子,首先从
https://github.com/soulxu/kvmsample
把代码clone下来,直接make,如果加载了kvm应该就可以看到输出了,kvm的api用法这里不表,仔细看看 前两篇文章之一就可以了,qemu虽然复杂,本质上也是这样运行的。这个例子中的guest是向端口输出数据。
一. IO端口在KVM中的注册
首先我们需要明确的一点是,IO port 这个东西是CPU用来与外设进行数据交互的,也不是所有CPU都有。 在虚拟机看来是没有IO port这个概念的,所以是一定要在vm exit中捕获的。
对于是否截获IO指令,是由vmcs中的VM-Execution controls中的两个域决定的。 参考intel SDM 24.6.2:

我们可以看到如果设置了Use I/O bitmpas这一位,Unconditional I/O exiting就无效了,如果在IO bitmap 中某一位被设置为1,则访问该端口就会发生vm exit,否则客户机可以直接访问。 IO bitmap的地址存在vmcs中的I/O-Bitmap Addresses域中,事实上,有两个IO bitmap,我们叫做A和B。 再来看看SDM

每一个bitmap包含4kb,也就是一个页,bitmap A包含了端口0000H到7FFFFH(4*1024*8),第二个端口包含了8000H到 FFFFH。
好了,我们已经从理论上对IO port有了了解了,下面看看kvm中的代码。
首先我们看到arch/x86/kvm/vmx.c中,定义了两个全局变量表示bitmap A和B的地址。 在vmx_init函数中这两个指针都被分配了一个页大小的空间,之后所有位都置1,然后在bitmap A中对第 80位进行了清零,也就是客户机访问这个0x80端口不会发生vm exit。
static unsigned long *vmx_io_bitmap_a;
static unsigned long *vmx_io_bitmap_b;

static int __init vmx_init(void)
{
    vmx_io_bitmap_a = (unsigned long *)__get_free_page(GFP_KERNEL);
    vmx_io_bitmap_b = (unsigned long *)__get_free_page(GFP_KERNEL);


    /*
    * Allow direct access to the PC debug port (it is often used for I/O
    * delays, but the vmexits simply slow things down).
    */
    memset(vmx_io_bitmap_a, 0xff, PAGE_SIZE);
    clear_bit(0x80, vmx_io_bitmap_a);

    memset(vmx_io_bitmap_b, 0xff, PAGE_SIZE);
    ...
}
在同一个文件中,我们看到在对vcpu进行初始化的时候会把这个bitmap A和B的地址写入到vmcs中去,这样 就建立了对IO port的访问的截获。
static int vmx_vcpu_setup(struct vcpu_vmx *vmx)
{
    /* I/O */
    vmcs_write64(IO_BITMAP_A, __pa(vmx_io_bitmap_a));
    vmcs_write64(IO_BITMAP_B, __pa(vmx_io_bitmap_b));


    return 0;
}
二. PIO中out的处理流程
本节我们来探讨一下kvm中out指令的处理流程。首先,将上一节中的test.S代码改一下,只out一次。
.globl _start
    .code16
_start:
    xorw %ax, %ax
    mov  $0x0a,%al

    out %ax, $0x10
    inc %ax
    hlt
kvm中guest发送vm exit之后会根据发送exit的原因调用各种handler。这也在vmx.c中
static int (*const kvm_vmx_exit_handlers[])(struct kvm_vcpu *vcpu) = {
    [EXIT_REASON_EXCEPTION_NMI]           = handle_exception,
    [EXIT_REASON_EXTERNAL_INTERRUPT]      = handle_external_interrupt,
    [EXIT_REASON_TRIPLE_FAULT]            = handle_triple_fault,
    [EXIT_REASON_NMI_WINDOW]          = handle_nmi_window,
    [EXIT_REASON_IO_INSTRUCTION]          = handle_io,
    ...
}
对应这里,处理IO的回调是handle_io。我们在target中执行:
root@ubuntu:/home/test# echo g >/proc/sysrq-trigger
这样调试机中的gdb会断下来,给handle_io下个断点:
(gdb) b handle_io
Breakpoint 1 at 0xffffffff81037dca: file arch/x86/kvm/vmx.c, line 4816.
(gdb) c
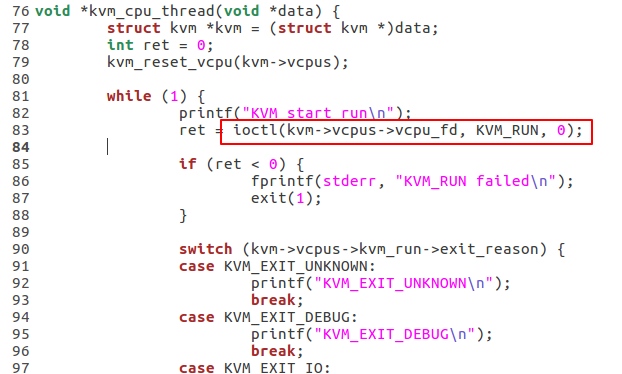
接着,我们用gdb启动target中的kvmsample,并且在main.c的84行下个断点。
test@ubuntu:~/kvmsample$ gdb ./kvmsample
...
Reading symbols from ./kvmsample...done.
(gdb) b ma
main        main.c      malloc      malloc@plt
(gdb) b main.c:84
Breakpoint 1 at 0x400cac: file main.c, line 84.
第84行恰好是从ioctl KVM_RUN中返回回来的时候。
好了,开始r,会发现debugger已经断下来了:
Thread 434 hit Breakpoint 1, handle_io (vcpu=0xffff8800ac528000)
at arch/x86/kvm/vmx.c:4816
4816    {
(gdb)
从handle_io的代码我们可以看出,首先会从vmcs中读取exit的一些信息,包括访问这个端口是in还是out, 大小,以及端口号port等。
static int handle_io(struct kvm_vcpu *vcpu)
{
    unsigned long exit_qualification;
    int size, in, string;
    unsigned port;

    exit_qualification = vmcs_readl(EXIT_QUALIFICATION);
    string = (exit_qualification & 16) != 0;
    in = (exit_qualification & 8) != 0;

    ++vcpu->stat.io_exits;

    if (string || in)
        return emulate_instruction(vcpu, 0) == EMULATE_DONE;

    port = exit_qualification >> 16;
    size = (exit_qualification & 7) + 1;
    skip_emulated_instruction(vcpu);

    return kvm_fast_pio_out(vcpu, size, port);
}
之后通过skip_emulated_instruction增加guest的rip之后调用kvm_fast_pio_out,在该函数中, 我们可以看到首先读取guest的rax,这个值放的是向端口写入的数据,这里是,0xa
int kvm_fast_pio_out(struct kvm_vcpu *vcpu, int size, unsigned short port)
{
    unsigned long val = kvm_register_read(vcpu, VCPU_REGS_RAX);
    int ret = emulator_pio_out_emulated(&vcpu->arch.emulate_ctxt,
                        size, port, &val, 1);
    /* do not return to emulator after return from userspace */
    vcpu->arch.pio.count = 0;
    return ret;
}
我们可以对比gdb中看看数据:
Thread 434 hit Breakpoint 1, handle_io (vcpu=0xffff8800ac528000)
    at arch/x86/kvm/vmx.c:4816
4816    {
(gdb) n
4821        exit_qualification = vmcs_readl(EXIT_QUALIFICATION);
(gdb) n
4825        ++vcpu->stat.io_exits;
(gdb) n
4827        if (string || in)
(gdb) n
4832        skip_emulated_instruction(vcpu);
(gdb) n
[New Thread 3654]
4834        return kvm_fast_pio_out(vcpu, size, port);
(gdb) s
kvm_fast_pio_out (vcpu=0xffff8800ac528000, size=16, port=16)
    at arch/x86/kvm/x86.c:5086
5086    {
(gdb) n
[New Thread 3656]
5087        unsigned long val = kvm_register_read(vcpu, VCPU_REGS_RAX);
(gdb) n
[New Thread 3657]
5088        int ret = emulator_pio_out_emulated(&vcpu->arch.emulate_ctxt,
(gdb) p /x val
$1 = 0xa
(gdb)
再往下,我们看到在emulator_pio_out_emulated,把值拷贝到了vcpu->arch.pio_data中,接着调用 emulator_pio_in_out。
static int emulator_pio_out_emulated(struct x86_emulate_ctxt *ctxt,
                    int size, unsigned short port,
                    const void *val, unsigned int count)
{
    struct kvm_vcpu *vcpu = emul_to_vcpu(ctxt);

    memcpy(vcpu->arch.pio_data, val, size * count);
    return emulator_pio_in_out(vcpu, size, port, (void *)val, count, false);
}

static int emulator_pio_in_out(struct kvm_vcpu *vcpu, int size,
                unsigned short port, void *val,
                unsigned int count, bool in)
{
    trace_kvm_pio(!in, port, size, count);

    vcpu->arch.pio.port = port;
    vcpu->arch.pio.in = in;
    vcpu->arch.pio.count  = count;
    vcpu->arch.pio.size = size;

    if (!kernel_pio(vcpu, vcpu->arch.pio_data)) {
        vcpu->arch.pio.count = 0;
        return 1;
    }

    vcpu->run->exit_reason = KVM_EXIT_IO;
    vcpu->run->io.direction = in ? KVM_EXIT_IO_IN : KVM_EXIT_IO_OUT;
    vcpu->run->io.size = size;
    vcpu->run->io.data_offset = KVM_PIO_PAGE_OFFSET * PAGE_SIZE;
    vcpu->run->io.count = count;
    vcpu->run->io.port = port;

    return 0;
}
在后一个函数中,我们可以看到vcpu->run->io.data_offset设置为4096了,我们可以看到之前已经把我们 向端口写的值通过memcpy拷贝到了vpuc->arch.pio_data中去了,通过调试我们可以看出其中的端倪。 vcpu->arch.pio_data就在kvm_run后面一个页的位置。这也可以从kvm_vcpu_init中看出来。
4405        vcpu->run->io.size = size;
(gdb) n
[New Thread 3667]
4406        vcpu->run->io.data_offset = KVM_PIO_PAGE_OFFSET * PAGE_SIZE;
(gdb) n
4407        vcpu->run->io.count = count;
(gdb) n
4408        vcpu->run->io.port = port;
(gdb) p count
$7 = 1
(gdb) n
4410        return 0;
(gdb) x /2b 0xffff88002a2a2000+0x1000
0xffff88002a2a3000: 0x0a    0x00
(gdb) p vcpu->run
$9 = (struct kvm_run *) 0xffff88002a2a2000
(gdb) p vcpu->arch.pio_data
$10 = (void *) 0xffff88002a2a3000
(gdb)
这样,我们看到vcpu->run->io保存了一些PIO的基本信息,比如大小,端口号等,run后面的一个页 vcpu->arch.pio_data则保存了实际out出来的数据。让target继续执行,这个时候我们断回了kvmsample 程序中。
(gdb) p kvm->vcpus->kvm_run->io
$2 = {direction = 1 '\001', size = 2 '\002', port = 16, count = 1,
data_offset = 4096}
(gdb)
这里简单说一下kvm_run,这是用于vcpu和应用层的程序(典型如qemu)通信的一个结构,user space的 程序通过KVM__VCPU_MMAP_SIZE这个ioctl得到大小得到大小,然后映射到用户空间。
(gdb) x /2b 0x7ffff7ff4000+0x1000
0x7ffff7ff5000: 10
我们通过gdb可以看到,我们在guest向端口写入的数据以及端口都能够从user space读出来。在这个示例程序中, 仅仅是把数据输出来,qemu中会根据端口去寻找对应的设备,然后执行对应的回调。
整体而言,out指令的流程是非常简单的,guest写端口,陷入kvm, kvm回到user space处理。
三. PIO中in的处理流程
虽然我们说guest访问端口包含了读写,都会导致vm exit。但是如果我们细想一下会发现,out和in肯定是不一样 的。out只需要guest写一个数据就好了,但是in还需要读回来数据。所以流程应该是guest发起一个in操作, 然后kvm处理,返回到user space之中,把数据填到kvm_run结构中,这样,kvm得到数据了再vm entry,这样 in的数据就能够到guest中了。
我们队实例程序做简单修改。在test.S中首先从0x10端口读入一个值,这个值为0xbeff,然后写到端口0x10。
test.S

# A test code for kvmsample

.globl _start
    .code16
_start:
    xorw %ax, %ax
    mov  $0x0a,%al

    in $0x10,%ax
    out %ax, $0x10
    hlt
对main.c做如下修改:

在处理KVM_EXIT_IO的时候区分了一下in/out,对in我们拷贝一个0xbeff过去。然后用在guest中用out向 端口0x10输出这个值。
执行in指令的第一次仍然是陷入kvm handle_io处理,只是这次走另一条路:
Thread 486 hit Breakpoint 1, handle_io (vcpu=0xffff88011d428000)
    at arch/x86/kvm/vmx.c:4816
4816    {
(gdb) n
4821        exit_qualification = vmcs_readl(EXIT_QUALIFICATION);
(gdb)
4825        ++vcpu->stat.io_exits;
(gdb)
4827        if (string || in)
(gdb)
4828            return emulate_instruction(vcpu, 0) == EMULATE_DONE;
(gdb) s
emulate_instruction (emulation_type=<optimized out>, vcpu=<optimized out>)
    at /home/test/linux-3.10.105/arch/x86/include/asm/kvm_host.h:811
811     return x86_emulate_instruction(vcpu, 0, emulation_type, NULL, 0);
(gdb) s
调用x86_emulate_instruction,这之中调用的最重要的两个函数时x86_decode_insn, x86_emulate_insn。
int x86_emulate_instruction(struct kvm_vcpu *vcpu,
            unsigned long cr2,
            int emulation_type,
            void *insn,
            int insn_len)
{
    int r;
    struct x86_emulate_ctxt *ctxt = &vcpu->arch.emulate_ctxt;
    bool writeback = true;
    bool write_fault_to_spt = vcpu->arch.write_fault_to_shadow_pgtable;

    /*
    * Clear write_fault_to_shadow_pgtable here to ensure it is
    * never reused.
    */
    vcpu->arch.write_fault_to_shadow_pgtable = false;
    kvm_clear_exception_queue(vcpu);

    if (!(emulation_type & EMULTYPE_NO_DECODE)) {
        init_emulate_ctxt(vcpu);

        r = x86_decode_insn(ctxt, insn, insn_len);

    }

restart:
    r = x86_emulate_insn(ctxt);


    if (ctxt->have_exception) {
        inject_emulated_exception(vcpu);
        r = EMULATE_DONE;
    } else if (vcpu->arch.pio.count) {
        if (!vcpu->arch.pio.in)
            vcpu->arch.pio.count = 0;
        else {
            writeback = false;
            vcpu->arch.complete_userspace_io = complete_emulated_pio;
        }
        r = EMULATE_DO_MMIO;


    if (writeback) {
        toggle_interruptibility(vcpu, ctxt->interruptibility);
        kvm_set_rflags(vcpu, ctxt->eflags);
        kvm_make_request(KVM_REQ_EVENT, vcpu);
        vcpu->arch.emulate_regs_need_sync_to_vcpu = false;
        kvm_rip_write(vcpu, ctxt->eip);
    } else
        vcpu->arch.emulate_regs_need_sync_to_vcpu = true;

    return r;
}
EXPORT_SYMBOL_GPL(x86_emulate_instruction);
第一个函数,x86_decode_insn,顾名思义,就是解码当前的指令。
int x86_decode_insn(struct x86_emulate_ctxt *ctxt, void *insn, int insn_len)
{

    /* Legacy prefixes. */
    for (;;) {
        switch (ctxt->b = insn_fetch(u8, ctxt)) {

    }

    /* Opcode byte(s). */
    opcode = opcode_table[ctxt->b];
    /* Two-byte opcode? */
    if (ctxt->b == 0x0f) {
        ctxt->twobyte = 1;
        ctxt->b = insn_fetch(u8, ctxt);
        opcode = twobyte_table[ctxt->b];
    }
    ctxt->d = opcode.flags;

    ctxt->execute = opcode.u.execute;
    ctxt->check_perm = opcode.check_perm;
    ctxt->intercept = opcode.intercept;


    rc = decode_operand(ctxt, &ctxt->src, (ctxt->d >> SrcShift) & OpMask);
    if (rc != X86EMUL_CONTINUE)
        goto done;

    /*
    * Decode and fetch the second source operand: register, memory
    * or immediate.
    */
    rc = decode_operand(ctxt, &ctxt->src2, (ctxt->d >> Src2Shift) & OpMask);
    if (rc != X86EMUL_CONTINUE)
        goto done;

    /* Decode and fetch the destination operand: register or memory. */
    rc = decode_operand(ctxt, &ctxt->dst, (ctxt->d >> DstShift) & OpMask);
}
首先通过insn_fetch获取指令,从下面的调试可以看到取到的指令正好是我们的in指令的机器码:
(gdb)
4366            switch (ctxt->b = insn_fetch(u8, ctxt)) {
(gdb)
4414        if (ctxt->rex_prefix & 8)
(gdb) p ctxt->b
$38 = 229 '\345'
(gdb) p /x ctxt->b
$39 = 0xe5
之后根据指令,查表opcode_table找到对应的回调函数,将回调赋值给ctxt->execute.对于我们的in指令 来说这个回调是em_in函数。
4472        ctxt->execute = opcode.u.execute;
(gdb)
4473        ctxt->check_perm = opcode.check_perm;
(gdb) p ctxt->execute
$41 = (int (*)(struct x86_emulate_ctxt *)) 0xffffffff81027238 <em_in>
(gdb) n
接下来就是调用三次decode_operand取出对应指令的操作数了。从下面的调试结果我们看出,源操作数 的值为ctxt->src->val=16,需要写到的寄存器是RAX,即ctxt->dst->addr.reg
(gdb) n
4528        rc = decode_operand(ctxt, &ctxt->src2, (ctxt->d >> Src2Shift) & OpMask);
(gdb) n
4529        if (rc != X86EMUL_CONTINUE)
(gdb) p ctxt->src->val
$42 = 16
(gdb) n
4533        rc = decode_operand(ctxt, &ctxt->dst, (ctxt->d >> DstShift) & OpMask);
(gdb) s
...
(gdb) p op->addr.reg
$46 = (unsigned long *) 0xffff88011d4296c8
(gdb) p ctxt->_regs[0]
$47 = 10
(gdb) p &ctxt->_regs[0]
$48 = (unsigned long *) 0xffff88011d4296c8
继续回到x86_emulate_instruction函数中,指令解码之后就是执行了,这是通过调用x86_emulate_insn 实现的。
int x86_emulate_insn(struct x86_emulate_ctxt *ctxt)
{
    const struct x86_emulate_ops *ops = ctxt->ops;
    int rc = X86EMUL_CONTINUE;
    int saved_dst_type = ctxt->dst.type;

    if (ctxt->execute) {
        if (ctxt->d & Fastop) {
            void (*fop)(struct fastop *) = (void *)ctxt->execute;
            rc = fastop(ctxt, fop);
            if (rc != X86EMUL_CONTINUE)
                goto done;
            goto writeback;
        }
        rc = ctxt->execute(ctxt);
        if (rc != X86EMUL_CONTINUE)
            goto done;
        goto writeback;
    }

writeback:
    rc = writeback(ctxt);
    if (rc != X86EMUL_CONTINUE)
        goto done;


done:
    if (rc == X86EMUL_PROPAGATE_FAULT)
        ctxt->have_exception = true;
    if (rc == X86EMUL_INTERCEPTED)
        return EMULATION_INTERCEPTED;

    if (rc == X86EMUL_CONTINUE)
        writeback_registers(ctxt);

    return (rc == X86EMUL_UNHANDLEABLE) ? EMULATION_FAILED : EMULATION_OK;
}
最重要的当然是调用回调函数了
rc = ctxt->execute(ctxt);
从之前的解码中,我们已经知道这是em_in了,相关调用函数如下:
static int em_in(struct x86_emulate_ctxt *ctxt)
{
    if (!pio_in_emulated(ctxt, ctxt->dst.bytes, ctxt->src.val,
                &ctxt->dst.val))
        return X86EMUL_IO_NEEDED;

    return X86EMUL_CONTINUE;
}

static int pio_in_emulated(struct x86_emulate_ctxt *ctxt,
            unsigned int size, unsigned short port,
            void *dest)
{
    struct read_cache *rc = &ctxt->io_read;

    if (rc->pos == rc->end) { /* refill pio read ahead */
        ...
        rc->pos = rc->end = 0;
        if (!ctxt->ops->pio_in_emulated(ctxt, size, port, rc->data, n))
            return 0;
        rc->end = n * size;
    }

    if (ctxt->rep_prefix && !(ctxt->eflags & EFLG_DF)) {
        ctxt->dst.data = rc->data + rc->pos;
        ctxt->dst.type = OP_MEM_STR;
        ctxt->dst.count = (rc->end - rc->pos) / size;
        rc->pos = rc->end;
    } else {
        memcpy(dest, rc->data + rc->pos, size);
        rc->pos += size;
    }
    return 1;
}

static int emulator_pio_in_emulated(struct x86_emulate_ctxt *ctxt,
                    int size, unsigned short port, void *val,
                    unsigned int count)
{
    struct kvm_vcpu *vcpu = emul_to_vcpu(ctxt);
    int ret;

    if (vcpu->arch.pio.count)
        goto data_avail;

    ret = emulator_pio_in_out(vcpu, size, port, val, count, true);
    if (ret) {
data_avail:
        memcpy(val, vcpu->arch.pio_data, size * count);
        vcpu->arch.pio.count = 0;
        return 1;
    }

    return 0;
}
在最后一个函数中,由于vcpu->arch.pio.count此时还没有数据(需要user spaces提供),所以会执行 emulator_pio_in_out,这在之前已经看过这个函数了,这就是设置kvm_run的相关数据,然后user spaces来 填充。
执行完了x86_emulate_insn,流程再次回到x86_emulate_instruction,最重要的是设置 vcpu->arch.complete_userspace_io这样一个回调。
if (ctxt->have_exception) {
    inject_emulated_exception(vcpu);
    r = EMULATE_DONE;
} else if (vcpu->arch.pio.count) {
    if (!vcpu->arch.pio.in)
        vcpu->arch.pio.count = 0;
    else {
        writeback = false;
        vcpu->arch.complete_userspace_io = complete_emulated_pio;
    }
之后这一次vm exit就算完事了。这样就会退到user space的ioctl KVM_RUN处。user space发现是一个 KVM_EXIT_IO,并且方向是KVM_EXIT_IO_IN,于是向kvm_run填入数据0xbeff。
case KVM_EXIT_IO:
    printf("KVM_EXIT_IO\n");
    if(kvm->vcpus->kvm_run->io.direction == KVM_EXIT_IO_OUT)
        printf("out port: %d, data: 0x%x\n",
            kvm->vcpus->kvm_run->io.port,
            *(int *)((char *)(kvm->vcpus->kvm_run) + kvm->vcpus->kvm_run->io.data_offset)
            );
    else if(kvm->vcpus->kvm_run->io.direction == KVM_EXIT_IO_IN)
    {
        printf("in port: %d\n",kvm->vcpus->kvm_run->io.port);
        *(short*)((char*)(kvm->vcpus->kvm_run)+kvm->vcpus->kvm_run->io.data_offset) = 0xbeff;
    }
由于user space的ioctl一般都是运行在一个循环中(如果不这样,guest也就不可能一直运行着了)。所以接着调用 KVM_RUN ioctl。在进入non-root的模式前,有一个工作就是判断vcpu->arch.complete_userspace_io 是否设置,如果设置就会调用。
int kvm_arch_vcpu_ioctl_run(struct kvm_vcpu *vcpu, struct kvm_run *kvm_run)
{
    int r;
    sigset_t sigsaved;

    if (unlikely(vcpu->arch.complete_userspace_io)) {
        int (*cui)(struct kvm_vcpu *) = vcpu->arch.complete_userspace_io;
        vcpu->arch.complete_userspace_io = NULL;
        r = cui(vcpu);
        if (r <= 0)
            goto out;
    } else
        WARN_ON(vcpu->arch.pio.count || vcpu->mmio_needed);

    r = __vcpu_run(vcpu);


    return r;
}
从之前的分之知道
vcpu->arch.complete_userspace_io = complete_emulated_pio;
看看相应的代码
static int complete_emulated_pio(struct kvm_vcpu *vcpu)
{
    BUG_ON(!vcpu->arch.pio.count);

    return complete_emulated_io(vcpu);
}

static inline int complete_emulated_io(struct kvm_vcpu *vcpu)
{
    int r;
    vcpu->srcu_idx = srcu_read_lock(&vcpu->kvm->srcu);
    r = emulate_instruction(vcpu, EMULTYPE_NO_DECODE);
    srcu_read_unlock(&vcpu->kvm->srcu, vcpu->srcu_idx);
    if (r != EMULATE_DONE)
        return 0;
    return 1;
}

static inline int emulate_instruction(struct kvm_vcpu *vcpu,
        int emulation_type)
{
    return x86_emulate_instruction(vcpu, 0, emulation_type, NULL, 0);
}
最终也是调用了x86_emulate_instruction,值得注意的是用了参数EMULTYPE_NO_DECODE,这就不会再次 解码。而是直接执行我们之前的em_in函数。
static int emulator_pio_in_emulated(struct x86_emulate_ctxt *ctxt,
                    int size, unsigned short port, void *val,
                    unsigned int count)
{
    struct kvm_vcpu *vcpu = emul_to_vcpu(ctxt);
    int ret;

    if (vcpu->arch.pio.count)
        goto data_avail;

    ret = emulator_pio_in_out(vcpu, size, port, val, count, true);
    if (ret) {
data_avail:
        memcpy(val, vcpu->arch.pio_data, size * count);
        vcpu->arch.pio.count = 0;
        return 1;
    }

    return 0;
}
在最终的emulator_pio_in_emulated中,由于这个时候vcpu->arch.pio.count已经有值了,表示数据可用了。 最终会把数据拷贝到ctx->dst.val中。
(gdb) n
em_in (ctxt=0xffff88011d429550) at arch/x86/kvm/emulate.c:3440
3440        return X86EMUL_CONTINUE;
(gdb) n
3441    }
(gdb) p ctxt->dst.val
$58 = 48895
(gdb) p /x ctxt->dst.val
$59 = 0xbeff
(gdb) n
回到x86_emulate_insn,执行完了指令回调之后,会调到writeback函数去:
if (ctxt->execute) {
    if (ctxt->d & Fastop) {
        void (*fop)(struct fastop *) = (void *)ctxt->execute;
        rc = fastop(ctxt, fop);
        if (rc != X86EMUL_CONTINUE)
            goto done;
        goto writeback;
    }

writeback:
    rc = writeback(ctxt);
    if (rc != X86EMUL_CONTINUE)
        goto done;
我们之前解码得到ctxt->dst.type是一个寄存器,所以会执行write_register_operand
static int writeback(struct x86_emulate_ctxt *ctxt)
{
    int rc;

    if (ctxt->d & NoWrite)
        return X86EMUL_CONTINUE;

    switch (ctxt->dst.type) {
    case OP_REG:
        write_register_operand(&ctxt->dst);
        break;


    return X86EMUL_CONTINUE;
}

static void write_register_operand(struct operand *op)
{
    /* The 4-byte case *is* correct: in 64-bit mode we zero-extend. */
    switch (op->bytes) {
    case 1:
        *(u8 *)op->addr.reg = (u8)op->val;
        break;
    case 2:
        *(u16 *)op->addr.reg = (u16)op->val;
        break;
    case 4:
        *op->addr.reg = (u32)op->val;
        break;  /* 64b: zero-extend */
    case 8:
        *op->addr.reg = op->val;
        break;
    }
}
最后一个函数op->addr.reg是解码过程中的目的操作数的寄存器,由之前知道是rax(&ctxt->_regs[0]),这样 就把数据(0xbeff)写到了寄存器了。但是这里是ctxt的寄存器,最后还需要写到vmcs中去,通过调用如下函数 实现
if (rc == X86EMUL_CONTINUE)
    writeback_registers(ctxt);

static void writeback_registers(struct x86_emulate_ctxt *ctxt)
{
    unsigned reg;

    for_each_set_bit(reg, (ulong *)&ctxt->regs_dirty, 16)
        ctxt->ops->write_gpr(ctxt, reg, ctxt->_regs[reg]);
}

static void emulator_write_gpr(struct x86_emulate_ctxt *ctxt, unsigned reg, ulong val)
{
    kvm_register_write(emul_to_vcpu(ctxt), reg, val);
}

static inline void kvm_register_write(struct kvm_vcpu *vcpu,
                    enum kvm_reg reg,
                    unsigned long val)
{
    vcpu->arch.regs[reg] = val;
    __set_bit(reg, (unsigned long *)&vcpu->arch.regs_dirty);
    __set_bit(reg, (unsigned long *)&vcpu->arch.regs_avail);
}
这样,接着进入guest状态的时候,guest得RAX就有了user space传来的数据了。下面是一些调试数据。
(gdb) n
x86_emulate_insn (ctxt=0xffff88011d429550) at arch/x86/kvm/emulate.c:4828
4828        ctxt->dst.type = saved_dst_type;
(gdb) p ctxt->dst.val
$64 = 48895
(gdb) p &ctxt->dst.val
$65 = (unsigned long *) 0xffff88011d429640
(gdb) p &op->val
No symbol "op" in current context.
(gdb) n
4830        if ((ctxt->d & SrcMask) == SrcSI)
(gdb) p ctxt->dst.type
$66 = OP_REG
(gdb) n
[New Thread 2976]
4833        if ((ctxt->d & DstMask) == DstDI)
(gdb) n
[New Thread 2978]
[New Thread 2977]
4836        if (ctxt->rep_prefix && (ctxt->d & String)) {
(gdb) n
4866        ctxt->eip = ctxt->_eip;
(gdb) n
4875            writeback_registers(ctxt);
四. 参考
oenhan: KVM源代码分析5:IO虚拟化之PIO
Alex Xu: 使用KVM API实现Emulator Demo
blog comments powered by Disqus